Tuesday, November 30, 2010

The Greeting Farm Blog Hop


I am so excited to be a part of the Greeting Farm Blog Hop. Here are my creations for the hop. I LOVED working with my Greeting farm images, and these cards were so much fun to make for the special hop. I hope you enjoy them.

Here is my card for the "Holiday Treats" Category. I chose to use my Just for You stamp set, and color her up in Traditional Christmas colors. I just LOVE how she turned out.
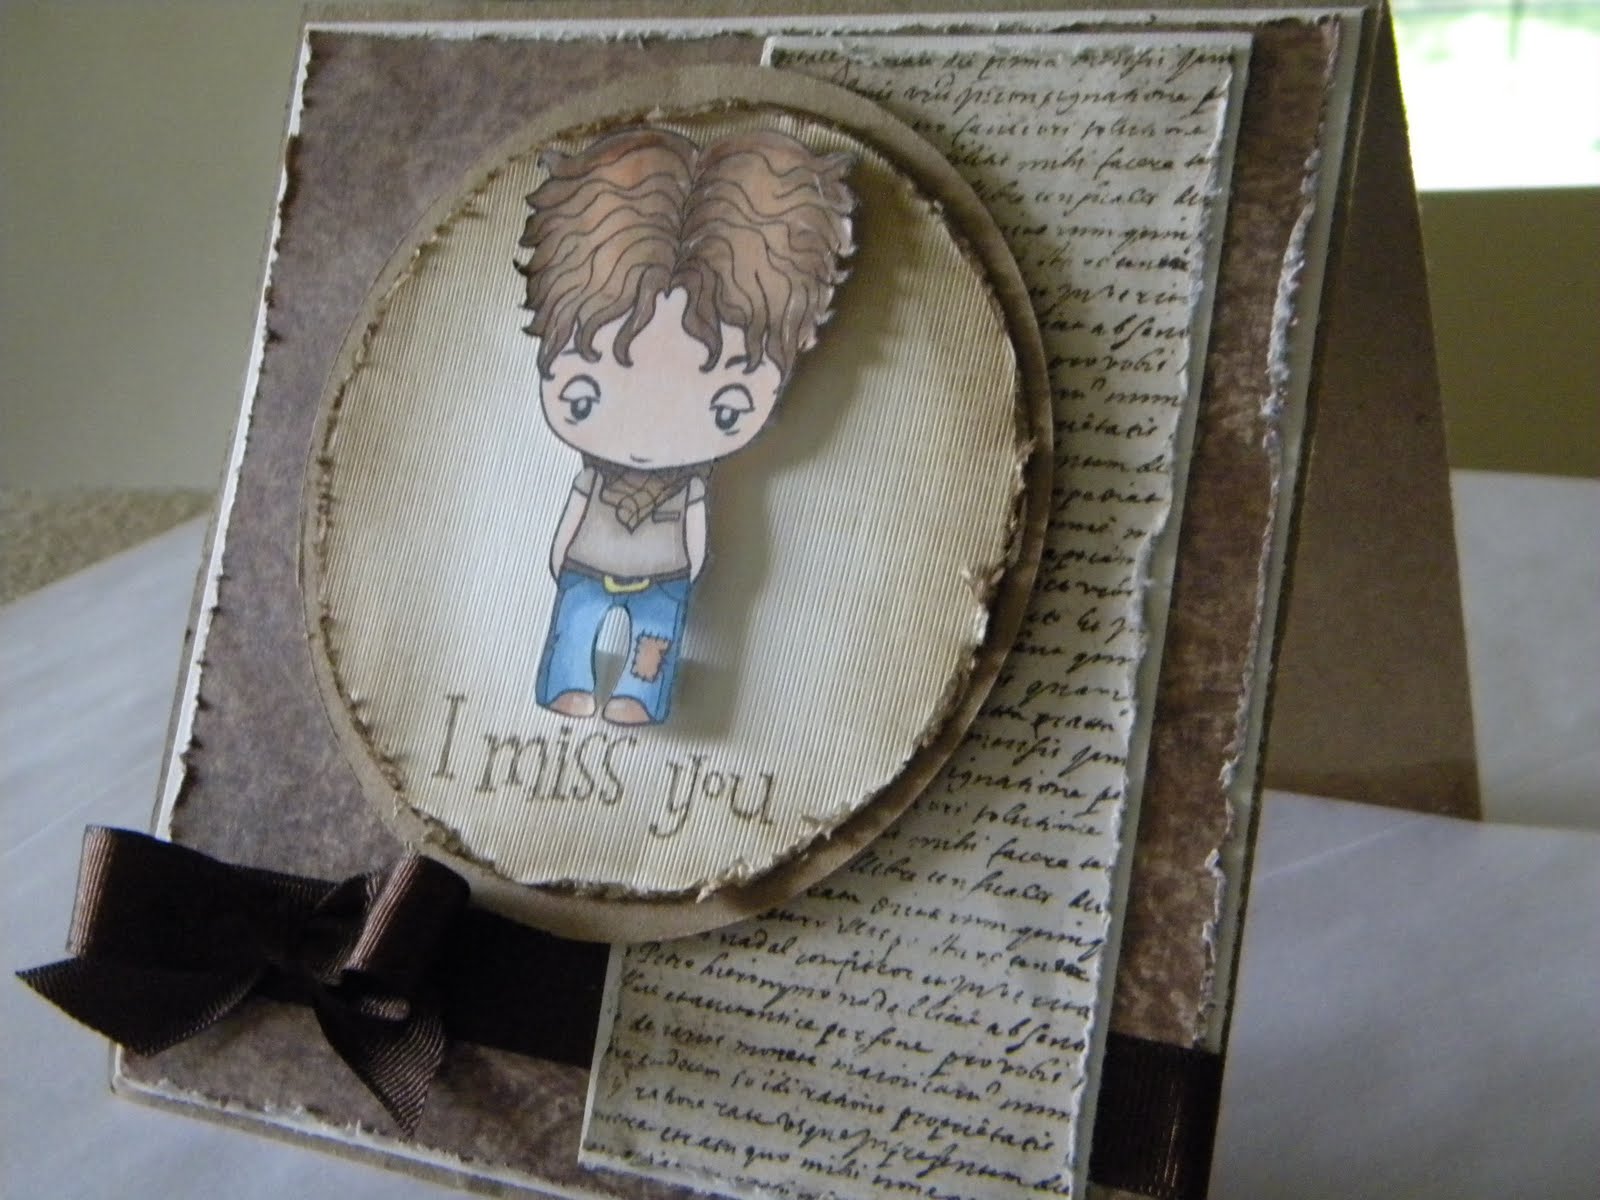
I followed the sketch from this weeks Saturday Sketch at Club Anya for this card. I just loved the sketch so much, I wanted to showcase it here.


And, Here is my card for the "Santa Baby" category. I LOVE this Cheeky Xmas girl, she is just adorable. I had to color her up in soft pinks to use with this yummy colorful Christmas paper.
I added lots of sickles to the"fur" of her outfit to give it that added sparkle and shimmer. I love this color combo, and love how this card turned out.

Thanks so much for stopping by to check out my creations for the blog hop. I cant wait to see all the creations from everyone, and to see all the new stamps for the December release! HOW FUN!!!!!! Check back at The Greeting Farm for your next stop on the hippity hop!!! Enjoy.

Snowy Bear

For this card I used a Lily of the Valley image I received from a friend. I love these stamps, and REALL need to order me some from their shop.
I chose to use these brown toned Christmas Papers, as I love the color combos with this little bear image. I think it turned out so cute. Sorry for the muted colors, in person, it is so deep and rich and color. I asked Santa for one of those picture tent thingies so that I can take better pics of my work, I am hoping I get it for Christmas. So, sorry about the poor picture quality.
I colored this cutie with copics-
Fur - E51, E33, E35, E57, E59
Scarf and hat - BG000, BG00, BG01, BG02
Shadow and snow - B0000

I added white Sparkly Fluff to the ground and snow flakes to give them some dimension and make it look like actual snow. It is so beautiful in real life, very sparkly!!!!
I added some prima flowers that I glimmer misted in Patina and Creme de Cocoa to match the color scheme. I then added a simple brown silk ribbon and tied the bow with my Bow Easy. I also added some brown and white pearls to finish off the card.
I am entering this card into the following challenges:
Lili of the valley - Bev's sketch
Anything Goes - Animals
Simon Says Challenge - Let it Snow
ABC Challenge - I is for Ice and Snow

Monday, November 29, 2010

color scheme Tilda in Winter Coat

Here is my take on the color scheme challenge over at Magnolia-licious Challenge Blog. This color scheme was quite a challenge, as I did not really have a paper that went along with those colors. SO, I had to get creative! I do like how it turned out, very out of my comfort zone, but turned out pretty, I think.
I used some of my new My Mind's eye Christmas paper, and some purple Bazzil cardstock as matting.
I used copics to color this Tilda -
Skin - E000, E00, R20
Hair - Y11, E31, YR20
Coat and tights- B0000, BV01, BV00, BV02
Boots - W1, W3, W5
Package - E33, E35, E31
Shadow - W1, B0000, W3
I added pink ribbon, and glimmer misted some prima flowers in gold and cosmos glimmer mist. I then colored some white pearls with my B24 copic marker, and added those to go along with the color scheme.

I am entering this card into the following challenges -
Paper Sundaes - Adorn those corners
Just Magnolia - Sketch
Cute Card Thursday - Blast from the past. (Dying for a punch (August 26th challenge) No Punches or die cuts were used on this card.)


Saturday, November 27, 2010

A golden Tilda


Here is my newest card, I used a new image I received, Angel Tilda. I just love her, and may have to add this new one to my ever-growing wish list.
I used my Graphic 45 Christmas Past papers for the design papers. I wanted to stick with a gold theme, and these papers were perfect! I did not have a gold ribbon, so I took a cream silk ribbon and sprayed it with my gold glimmer mist. It turned out perfect. I also used my gold glimmer mist to color the flowers.
I colored tilda with copics -
Skin - E000, E00, R20
Hair - E51, E55, E57, E59
Dress - Y20, Y23
Wings - Y11, Y13, Y15
I added stickles to her halo, dress, and wings for added sparkle and shine! I inked the oval that Tilda is sitting on with Antique Linen Distress ink to match the colors of the card.
I cut the sentiment out from the design paper. I thought the angels and sentiment went perfect with this card and image.
I am entering this card into the following challenges:
Totally Tilda - Glitz and Gold
7 Kids College fund - Non-Traditional Christmas colors
magnolia Stamp Lovers - Punch it up
papertake weekly - cut it out
ABC Christmas Challenge - X is for xmas
Carisma Cardz - One for the girlz
Create 4 fun - Sketch
Totally Papercrafts - Untraditional Christmas colors
Fussy and Fancy Friday - Christmas With no Red or Green
All That Scraps - Magnolia Christmas

DCD Christmas Club - DT - Use a Die Cut

This card won at icopic Challenges!!!

Here is my card for this weeks DCD Christmas Challenge. The challenge is to Use a Die Cut. So here is my take on that challenge.
I used this gorgeous image, Tree Fairy, created by my fellow DT member, Roberta. ISnt it just the cutest thing you have ever seen??? Roberta is uber talented, and I am honored to use this gorgeous image in one of my creations!
So, I used my cricut to cut out the scalloped oval frame, which are my die cuts on this card. I added sticky back pearls to the scallops for some added fun!
I added four brads to my card, the pearls at the top and bottom corners are brads.
Well, of course, I added lots of roses. I glimmer misted them in Scarlet and Walnut Gold to match the design paper and image.
As a side note, I had disaster strike while creating this card. I toppled over a bottle of Scarlet Glimmer mist while I was painting my large rose!!!!!! :( It spilled all over my craft desk, ruining some of the things I have been working on. LUCKILY, this baby only got touched a bit, and I was able to cover some of the areas that got ruined. FYI, always screw the lid on tight to your glimmer mist, and be careful! It could have been much worse than it was. There is a tiny dot near the bow that is the spilled glimmer mist. At least it has character, right???!!!
I colored this beauty with copics -
Skin -E000, E00, R20
Hair - E53, E57, E59
Dress - E40, E41, E42, E43, R29, R27, R24, R20
Shading - W1, W3, Antique Linen Distress ink
Wings - Y15, Y13, Y11, 0
Ornament - R29, R27, R24, Y15
I am entering this card into the following challenges:
Icopic - Color Challenge and use an ornament
A Spoon Full of sugar - Anything goes
Cupcake Crafts - Fairytales (Tree Fairy image)
Papertake Weekly - Cut it out (scalloped and regular oval)
ABC Christmas - X is for Xmas
Creative Inspirations - Anything Christmassy/Wintery
Stamping Scrapping - Christmas
Delightful Sketches - Flower Power


Wednesday, November 24, 2010

Cheeky Birthday

Here is a card I made using my new Cheeky Beauty stamp from the Greeting farm. Isnt she just the cutest thing ever???!!!!
I used the sketch from this weeks Saturday Sketch over at the Club Anya blog. I just love following the sketches every week, it helps when I have creative block!!! hehehe
For the oval background, which I cut out on my cricut, that she is sitting on, I stamped my Tim Holtz French Script stamp in the background in Walnut Stain Distress Ink, then I distressed and blended the edges with the same ink. I also stamped the sentiment with Walnut Stain, and distressed the edges of the sentiment with Walnut Stain Distress ink.
I added stickles to her tiara, dress hem, and shoes for added pop.
I colored this cutie with copics -
Skin - E000, E00, R20
Hair - Y11, Y23, YR23, E53
Dress - RV00, RV02, RV13, G24
Tights - RV02, G20
Shoes - RV00, RV02
I am entering this card into the following challenges:
Club Anya - Saturday Sketch
A Spoon Full of Sugar - Anything Goes
Papertake Weekly - Cut it out


Saturday, November 20, 2010

Greeting Farm Birthday wishes

This card won the Challenge at Simon Says Stamp!!!!!

Just one more post from me tonight. Here is a card I created using this adorable Greeting farm image. A friend of mine sent me this image, so I am not even sure of her name, but I think she is adorable.
I used the sketch from Creatalicious Challenges for the design of this card. I kept the sketch as it was posted, yet my flowers cover up a bit of one of the squares. I used my nesties labels 8 die to cut this cutie out, and then distressed the background with Dusty Concord Distress Ink. I cut the sentiment label out on my cricut, then added the sentiment from my Anya Says stamp set. I then also distressed the sentiment with Dusty Concord to match.
I colored this cutie with copics, but she has been sitting in my stash for a bit, so I am not exactly sure what colors I used. Sorry kids, I should have written it all down, next time!
There is a TON of sparkle on this card, but it did not photograph that well. I tried to show all the bling and shine, but it just does not do justice in the photos. I glimmer misted the white prima flowers with Lily pad, Sage, and Pashmina Glimmer mist. I then added Prima bling to their centers for added sparkle. I punched out the butterflies with my Martha Stewart Monarch punch, and added stickles to them. I also added stickles to the images dress and hair bows.
There is bling corners added to the left side, top and bottom, of the card for just a bit more sparkle. I hope you enjoy this sparkly birthday card. I had a blast creating it!

I am entering this card into the following challenges:
The Greeting farm - Farm Fresh Friday Sparkly Birthday
Simon Says - Sparkle
Oh Alice - Use a butterfly

Autumn Thanks

I am feeling so thankful for all the things in my life this week. With Thanksgiving coming up here next week, I am thinking about all the things I am so thankful for, one of them being this amazing craft that I love so much. Papercrafting is such a special gift, and I am so thankful that I am able to participate in this wonderful crafting community. I am inspired each and everyday by another papercrafter, and I hope that I can someday inspire someone else. Here is my card to celebrate that feeling of papercrafting community.
I know that I have used this image, Tilda in Autumn Leaves, recently on another card, but I just LOVE her so much, I had to use her again when this card came to mind. I love the autumn colors, they are so warm and welcoming, and this cutie image seemed to be the perfect fit!
I added LOTS of Stickles to this image in the leaves, so it kinda looks like Tilda is falling in glitter. In person, it is so shimmery, it is To Die For!!!! The picture totally does not do it justice, it is so sparkly and shiny!
I colored this image with copics:
Skin -E000, E00, R20
Hair - Y11, Y20, YR20, E53
Shirt - YR0000, YR000, YR00, YR01
Pants - B91, B95, B97
Leaves - E08, E33, E35, YR04, YR20, R39
I added lots of roses to this card from iamroses.com. I am completely obsessed with her flowers, they are gorgeous! I glimmer misted the orange rose buds with Oriental Poppy Glimmer Mist. The brown roses were already pre-colored, So I just added Gold Glimmer mist to them to add some sparkle. I also added Stickles to the edges of the roses for some added bling.
I followed the sketch from The Pixie Cottage and Lord Have Mercy (I lucked out as their sketches were SUPER similar, almost identical this week)for the layout of this card. I did have a flip it and move some of the embellies around to make it work for the way this stamp is situated, but I totally LOVE how it came out. I also used a faux stitching stamp that I have to add some faux stitches to the orange layers of the card. I love this look. I wish I could sew, but that is still not a craft I have gotten into, so, for now, I will stick with my faux stitching stamp!

I am entering this card into the following challenges
7 Kids College Fund - Give Thanks
Papertake Weekly - Autumn Skies
Simon Says - Sparkle
The Pixie Cottage - Sketch and/or Ribbons and Bows
ABC DT Challenge - Sew Special
Simon Says Stamp and Show - Something that makes you happy - GLITTER

Friday, November 19, 2010

Hugh Misses You

This card won at A Spoon Full of Sugar!!!!!!!

Here is a quick post, as I am typing this at 11pm, and I still have some wet projects sitting on my craft desk waiting for finishing touches before bed! LOL
I have many (I think probably three) posts coming your way tomorrow, so this is just a quick one before I head off for the night.
For this card, i used Hugh from The Greeting Farm. I absolutely LOVE him, isnt he just adorable. I love all Greeting Farm Stamps, though, so who am I to judge, but I think he is just the best!
I made this card following the idea on Club Anya for Mystery Monday. I loved the card we were supposed to case. It was simple, yet just so darn cute. I chose to stick with only the brown family colors, and think it turned out great.
I colored him with copic markers:
Skin - E000, E00, R02
Hair - E53, E25, E27, E29
Shirt - E40, E41, E42
Pants - B91, B95, B97, E33, Y15,
Shoes and Bandana - E33, E35, E37
I am entering this card into the following challenges:
Club Anya - Mystery Monday
Stampavie and More - Monochrome
A Spoon full Of Sugar - Distressing

Wednesday, November 17, 2010

OOOPPPPSSS, Im sorry (oops Tilda)

Here is my card using Oops Tilda. I love her, I think she is just adorable! I think this is one of my fave cards I have made recently, as I love the brown and green combo, it was so fun to work with.
I used the sketch from Just Magnolia for the design and layout of this card. I absolutely love how it turned out. I distressed all the edges of the papers with my Tim Holtz distress tool. I also distressed the oval background of Tilda with a Tim Holtz Stamp, Blending tool, and Walnut Stain Distress ink.

I printed the sentiment on my computer, and put it behind a Tim Holtz plate that I cut on my cuttlebug. This die automatically embosses as it cuts, and I just LOVE it! Then I added some sparkle bling to the top and bottom of the plate for added interest. I adhered the plate to the card, then used my Tim Holtz Tiny Attacher on the corners for added interest and dimension.
I added a green ribbon to the side, and lace at the bottom for some added touches. I added some roses from iamroses.com and painted them with Key Lime Pie Glimmer Mist.
I colored Tilda with copics -
Skin - E000, E00, R20
Hair - E53, E55, E57, E59
Dress - G20, G21, G24
Apron and hay - E40, E41, E41, 0

I am entering this card into the following challenges:
Just Magnolia - Sketch
Paperplay Challenges - Ribbon, Lace, and Flowers
Paper Sundaes - Ribbon Embossing, Punches
Die Cut Dreams Challenges - Use Staples on your work
Cute Card Thursday - Anything Goes
A spoon Full of Sugar - Distressing

Greeting Farm Wednesday

Here is my card for this weeks Saturday Sketch over at the Greeting Farm Website. I used Wednesday, isnt she so adorable?
I chose to stick with the black and purple color scheme, and I think it turned out pretty good.
I colored Wednesday with copics -
Skin - E000, E00, R20
Hair - E53, E55, E57, E59
Skirt and Shoes - C1, C3, C5, C7, C9
Sweater - BV00, BV01, BV02
I kept this card very simple, as I wanted to be able to see the sketch, as I just loved the layout.

I am entering this card into the following challenges:
Club Anya - Saturday Sketch
Totally Papercrafts - Purple and Black

Monday, November 15, 2010

Christmas card with Silent Night Tilda

I LOVE Silent Night Tilda, I think she is just too cute. So, I decided to make this cute Christmas Card with her for a couple of challenges.
I used Graphic 45 Christmas Past Deluxe patterned paper for the paper in this design. I love the muted colors and great designs of this patterned paper.
I followed the sketch from Sketch Saturday for the design and layout of this card. I absolutely LOVE this sketch, simple, yet absolutely beautiful. I cute the scalloped oval on my cricut, and used it as a frame around this beautiful Tilda. I also added some stickles to areas of Silent Night Tilda for added interest and sparkle!
I colored Tilda with copics:
Skin - E000, E00, R20
Hair - E53, E57, E59
Coat - E40, E41, E42, E43
Tights - G20, G21, G24
Boots - E33, E35, E55, E57, E59
pole and flowers - E33, E35, R29, R27, R24, G24, G21
Snow - B000, W1
Shadow - W1, W3, W5. B000
I added some Prima Pointsettia flowers to the corner of this card to finish off the look. I love these flowers, so pretty and sparkly, as they have their own glitter already added to them. I used a red ribbon, then added this cream braided ribbon with gold pearls on top of the red. I love this ribbon, it is perfect for Christmas cards.
I am entering this card into the following challenges:
Really Reasonable Ribbon - Christmas Theme
Creative Inspirations - Anything Chrismassy
Paper Sundaes - Toppings - punches and ribbon
Simon Says Stamp and Show - Whatever makes you happy (Christmas makes me VERY happy)
Totally Gorjuss - Traditional Christmas colors